Monday, September 30, 2019
Another Insert for my Fauxdori.
I used a bigger junk mail envelope with 2 windows for this insert.
I also lined the inside of the window with book pages.
I thought I would add a bit of a colorful tag, to break up the brown hues.
On the left I just added 2 pockets per The Paper Outpost tutorial. On the right I made a clear pocket.
These inserts I cut out of an old North Carolina book.
I used a clear pocket for this side, because I liked the way the background turned out.
Inserts from the clear pocket.
On the back is a bigger window pocket.
I also lined the inside of this window.
I typed the words in the center to fill up that empty space on the journal card.
I like altering junk mail envelopes. They are very useful.
Renate
Monday, September 23, 2019
Origami Envelope.
Carrie Chambless has a tutorial on how to fold this envelope. I made mine an 81/2 x 81/2 and folded the sides at about 4 inches. I sprayed some copy paper with different colors and then dried it real good, before folding it.
I added some corrugated cardboard to the center after adding one layer of UTEE. I also added UTEE to the heart.
I don't add much lace to my projects, but I thought it looked good under the heart and some metallic string.
So far I just added 2 inserts, but there's room for more.
I had an old stamp and added some stamping as well.
These are easy and fun to make.
Renate
Sunday, September 22, 2019
My New Fauxdori.
I finally finished my Faudori. I used the crackle effect on the cover. I used dark grey and midnight blue acrylic paints for my base. Then a layer of school glue. While still tacky I added the top color.
I think it was beach glass acrylic paint from Martha Stewart. Then let it dry. Anyways, the effect turned out great. I also stamped on it afterwards. For the background I used an old playing card and old negatives.
I made a charm with a key ring that I covered in some fabric, I had dyed with food coloring. Gi Kerr has a great tutorial on how to do these.
This is the back.
Here is the front. I made a moon shape out of corrugated cardboard. Under the #5 is a tuck spot.
On the inside I made a pocket with an acetate window.
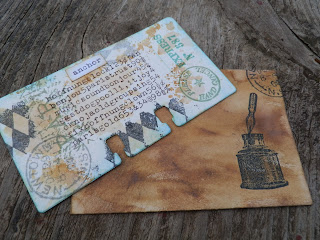
I like to decorate these Rolodex cards and use my typewriter and stamps.
This was a pencil pouch from the Dollar store. I just cut it down to size and kept the rivets. Now I just have to insert things thru the bottom. I can't remember who it was, but I've seen a tutorial for it.
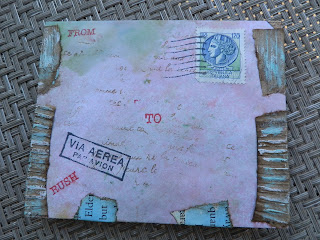
A small envelope I decorated.
This is the front cover for my journal. I took a piece of printer paper and sprayed it with water that had about 3 drops of red food coloring in it. Then I dried it and took it to my printer. I have an old register book. I took out a page and copied it to the pink paper.
Small pocket.
A pocket made with book pages.
This insert has 3 pockets.
This insert has also 3 pockets. 2 narrow ones and a wider one in the back. Junk Journal Ideas has a tutorial on how to make these with envelopes. I made mine out of card stock since I wanted to use it as part of an insert for my book. I sewed mine instead of gluing it in the middle.
On the back I made a flip out envelope with a small booklet inside.
Here I just sewed old book pages to make pockets.The Paper Outpost has a tutorial on it. Instead of gluing my pockets, I sewed them down.
A long acetate side pocket.
Inserts for the pocket.
Acetate side pocket with 2 windows.
This project I've seen at Bohamian Crafting. I think she made hers out of envelopes. Once again I made mine from scratch out of card stock. On top I cut out an acetate window.
Then you flip out this part and you have this net image. I put a faux rust finish on it and then a layer of UTEE to make it a bit stronger. This flips up.
Under it is another pocket.
On the back of it is a side pocket and an envelope.
For the back I made a little pouch to hold knick knacks.
Here you can see my acetate pouch, that goes in the back.
Sorry for sooo many pictures. Eventually I want to make some videos. But thanks for visiting.
Renate
Subscribe to:
Comments (Atom)


