Sunday, January 26, 2020
Double sided altered Paperclip.
Jamie Parady has this great project on her You Tube channel. This is the front of my design. I used faded blue jean ink for my background. Then I stamped over it with some gray ink and a script stamp.
I sewed around 3 edges and then added the other items. I like to use negative strips in my work when I can.
This is the back design. I made a small pocket to add some goodies.
Here you can see it my journal.
It fits perfectly. This is a great project to make, and you can use whatever shape or size you want.
Renate
Make your own Buttons.
Nina Ribena has a great tutorial on how to make the buttons. Hers are beautiful. Mine are just a bit over half an inch.
I added brushed bronze acrylic paint around the edges after I punched the holes. Then I added 3 layers of UTEE to my buttons.
This is my collage page I made and used pieces from it to make the buttons. I also used some old book pages. These are fun to make.
Renate
Thursday, January 23, 2020
Stacked Envelopes Journal.
The Book Vandal Shop has a tutorial on how to make this project. It was fun to put it together.
I added a pocket to my front envelope with an attached small tracing paper pocket.
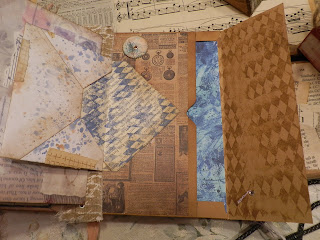
Here the top 2 envelopes are flipped open. I made the envelope on the left. In the middle is an altered junk envelope.
Dan Tirels has tutorials on how to make these backgrounds. I used acrylic paint and a tissue paper.
I made several of these and then cut some up for journal cards.
Then you flip the altered envelope to the left, and you have the 4th and last envelope in the center.
I also made that envelope.
This is the center.
After you fold all the envelopes back, you open a new page. I chose not to make this an envelope.
Instead I added a 6 pocket page.
This is the cover for the junk journal part. I used elastic to hold my pages and 2 eyelets on the spine.
Here are some more papers I made using Dan Tirels technique. Here I also added some stamping.
Here is another sheet I made.
On the right, I made my own envelope, for the back cover.
Another journal card.
I made this envelope to be part of the envelope closure.
One mistake I made... when I added the top eyelet closure part, I went all the way thru the envelope!!! Not my smartest move. But it's ok.
And here the back cover. Here you can see the back of the eyelet.
Thanks to Dan Tirels and The Book Vandal Shop for the great inspiration.
Renate
Thursday, January 16, 2020
Pages from my new Journal.
Here are a few pages from my Journal I'm working on.
On the left is a pocket tag with an envelope. The tutorial can be found at shabbydabbydoodah.
I also added a pocket made with some tracing paper.
This bookmark tutorial can be found at Luise Heinzl. On the back is a paperclip. On the bottom you have a side pocket. I also added a pocket on top.
This is part of an envelope you alter to fit over your pages. I don't remember where I found this project. You flip this part up.
Here you can see the envelope that i covered in music paper. On the right is another insert.
This is the insert. Also a tutorial from shabbydabbydoodah. I added one more pocket on the bottom.
Here without the journal cards.
Journal cards.
This insert fits perfectly in that envelope.
For this page I just used some acrylic paint that I blew with a straw.
For the pocket I used a folded over piece of tracing paper and added some goodies on the inside.
This project can be found at robindudleyhowes. I love the way this page turned out.
Thank you to all the Ladies for the great inspirations.
Renate
Saturday, January 4, 2020
Loaded Pocket Belly Band.
Over at Junk Journal Ideas you can find a tutorial for these pockets.
For this one I used a junk envelope as the pocket/belly band part. I also folded part of the envelope up, to give me another pocket. I decorated with book pages and stamped over it. For the background, I just used a stencil and sprayed some paint on it.
Here I took everything out.
These are my inserts.
For this one I choose to sew the left side of the pocket and on the right side I added 3 eyelets.
Here is a close up of my puzzle charm. I added just one layer of UTEE. For the other 2 eyelets I just tied some fabric thru them.
Here it is empty.

These are the inserts for this pocket.
I made 3 different sizes.

This was my first pocket I made. The ticket fit perfectly over this pocket.
These are the inserts for this pocket.
Here is the empty pocket.
These are fun to make. Thank you Donna for the inspiration for this project.
Renate
Subscribe to:
Comments (Atom)


