Sunday, August 30, 2020
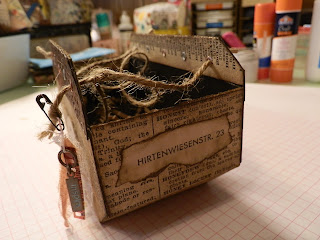
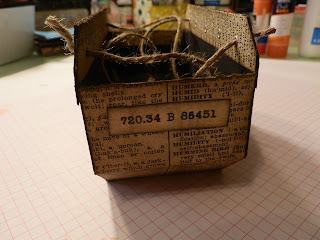
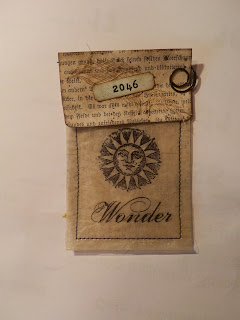
Vintage Treat Bag.
You can find the assembly tutorial at Dreaming Tree. I don't have a SVG file, so I made mine from scratch.
It is a good size for candy or ephemera. You can fill it with just about anything to give to someone as a little treat or pick-me-up gift. Or maybe make it a coffee or tea themed treat bag. Thank you for the inspiration.
Renate
Thursday, August 27, 2020
Fabric Cube And Bags.
The panels measure 4 x 4 inches when done. I also added 2 pockets.
For weight on the bottom I added a bit of rice.
Then I made some mini fabric bags. I started out with 6 x 14 inches of fabric and then fold them in half. I got the idea from Angie at ChicknScratch. They are quite easy to assemble.
I made my corners different. I matched up the seams and measured about 1 inch in from tip and sewed across, and then cut off the excess. I think it gives it a straighter seam.
Makes a nice ephemera holder.
These would also make cute Halloween treat bags. These are great projects to use up your scraps.
Renate
Tuesday, August 25, 2020
Coin Envelope with Tuck Spot.
Maureen Astrid has a great tutorial on how to make these coin envelopes. The only thing I changed was the back bottom flap. I made it a bit bigger, so I could use it as a tuck spot. I also used some of Maureen's printables.
I chose the scissors charm, because the back has a scissor image on it. The only thing holding my flap is the 2 faux rust pieces I made for the sides.
Here is the back side.
These are my inserts for this pocket. I also made the library card, that I typed up.
Here a close up without the stuff in it.
For this one I made the bottom flap a bit smaller. I added a charm I made.
These are the inserts for this pocket.
This is the back.
For the last one, I just ripped the flap on the bottom.
I had a piece where I cut out the 2, so I just used the leftovers on this pocket. I made a little paper stack instead of a tag.
I used round faux metal pieces for the sides.
This one I made with a paperclip and a small pocket on the bottom.
These where fun to put together. Thanks Maureen for the great idea.
Renate
Clear Vinyl Pockets with faux Glassine Panels.
Over at Junk Journal Joy you can find a great tutorials for these pockets. The only change I made is that I didn't glue my glassine panel to the vinyl. Instead I backed it with a piece of acetate. Before assembling the pocket, I sewed a piece of fabric across to hold the acetate and the glassine in place.
For this pocket I stamped on a napkin and added my glue to make it see through. After I peeled it off and it was dry, I added some blue ink to the background. I also added some of my faux water drops. For the closure I used a hanger paperclip.
Here you can see the fabric I used to hold the glassine panel and the acetate in place before I sewed down the sides and bottom.
This is the bigger pocket.
And one more smaller pocket. I used some old sewing tissue paper and stamped on it.
I decorated the back to hide some of the sewing.
Again I sewed the pocket opening part. I did this on all 3 pockets.
Renate
Subscribe to:
Comments (Atom)


