Monday, July 15, 2019
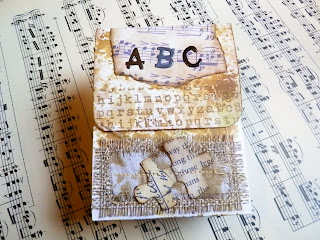
Mini Backpack.
I saw a tutorial at Bambidearr on You Tube. I just made a few changes, since I wanted to be able to use a 81/2 in x 11 in piece of cardstock. And I wanted the lid to be attached not separate.
For the closure I used a magnet. I started out with white cardstock and splattered it with vintage photo and gathered twigs and peeled paint inks. Then I just stamped on it with the typewriter background stamp.
I decided to sew a small pocket in the front.
I added 3 charms to one side of the backpack.
The straps I covered in old German book pages.
I went with the original scoring for the sides, like it was shown in the video. I liked it better then other versions I've seen.
A close-up of the front.
Here you can see what the side looks like when open.
The letters I covered in 2 layers of UTEE.
I used a 91/2 in x 8 in piece of cardstock. The bottom I reduced to 11/4 in. The height is 4 in + 2 3/4 in for the lid. The straps are 1/2 in - 1/8 in x 6 in. The side panels are 11/2 in wide and the front and back are 3 in wide. And you have a 1/2 in flap on the side to glue it together.
You score it at: 1/2 2 5 61/2 on the 91/2 in side then turn it to the 8 in side with the 1/2 in on top and score it at: 11/4 51/4. You will have to cut away the boxes that are to the left of the flap. You also have to score the lid then at 3/8th of an in. I hope that was not to confusing. These make good gift card holders or just to put some goodies in it.
Renate
Subscribe to:
Post Comments (Atom)


No comments:
Post a Comment