Tuesday, June 30, 2020
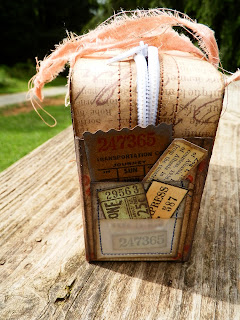
Small Clear Backpack.
My backpack is about 51/2 inches tall and 23/4 wide. The tutorial is again from Kristianne's crafty adventures. This time I used a paper pad from Prima. The plastic I recycled from packaging that sheets came in.
I didn't wanted to use Velcro, so I designed my own closure. I also made the bead for the center.
I sewed some fabric on top of my straps.
The bottom trim is again 11/2 inches wide.
The top border is 3/4 inches wide. As with the other projects, I sewed both my trims on before attaching it to the base.
Renate
Sunday, June 28, 2020
Mini Vintage Gym Bag.
My bag measures 5x4 inches. I found the tutorial at: Kristianne's crafty adventures.
On one side I added 2 pockets. The hardest part by far, was adding the zipper panel to the bag.
This is the back view.
For the other side I just made a paper bag. For the handles I used some leftover fabric I had dyed.
for the front I decided on just a wider pocket.
I recycled a white zipper from a plastic bag. I used my zipper foot for the zipper sewing. It worked great.
This took me a while to put together. I made me a test bag before I did this bag. But it was well worth it. Thank you Kristianne for the inspiration.
Renate
Saturday, June 27, 2020
Small Shaker Gift Bag.
This is made with the same measurements as the last gift bag I made with the acetate. Again I painted and stamped my cardstock. I sew my plastic to the cardstock, top and bottom, before I attach it to the base box.
This is the charm I made for this gift bag.
I used pieces of an old book, where I stamped, because I didn't like the image. So you see, You can always fix what you don't like.
For the confetti I used a lot of punch and die leftovers. I got a jar where I save all the punched out pieces. Also some sequins and word tags I made.
Here you can see the back. I used 2 staples on the top and one on the bottom.
Maybe you can see here how I do mine. My bottom border is 11/2 inches wide. then I sew the plastic 1/2 in from the top. This way when I glue it to the base, you have cardstock to glue to the base not plastic. For this one I made the top trim 3/4 inches wide.
Here you can see the staples.
For my handles I used some fabric. For the plastic I used some packaging from sheets.
Renate.
Wednesday, June 24, 2020
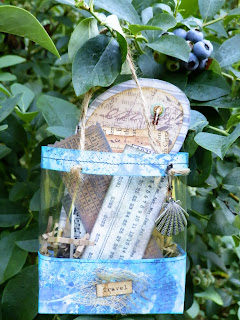
Small Clear Gift Bag.
I found this great tutorial at: Kristianne's crafty adventures. It was fun to put together. I used my cardstock I painted.
The only changes I made is, that I made the bottom part 1 1/2 in wide. This way I had cardstock to glue to the base, not acetate. I sewed the acetate to the cardstock about 1/2 in. from the bottom of the acetate. I hope this makes sense. This made my bag 4 in. tall. In the back I just glued the cardstock together where it overlapped. On the top I added one staple to keep it closed. Where the acetate overlapped in the back, I didn't do anything.
I stuffed my bag with some ephemera I made and I used rope for my handles.
I added a shell to the front with a mini safety pin.
This our cat Elliot in the background.
While back I made a flip-flop card. It's on my blog if you would like to check it out. Here you can see part of my blueberry bush. I better get to picking!!!
This is a little booklet, made with playing cards.
The back of the booklet.
My flip-flop card.
And some more ephemera.
I made this calendar on my computer. .
I like playing with Tim Holtz' ticket stamps. Sometimes I just use the numbers, or just use part of the stamp.
Thanks for the tutorial and inspiration.
Renate
Thursday, June 11, 2020
Yellow Journal Card.
Charlotte Peterson was doing the "Y" challenge... yellow. I thought I give it a spin, and try to do something with yellow. I used mustard seed and wild honey inks for the background.
I stamped all over the background with my ticket stamps. Then I just scribbled the border in.
When I added my pocket, I noticed that it looks like I got tickets stuck in there.
These are just a few inserts I tucked in the pocket.
I enjoyed making this journal card. It was a nice change, from the usual colors I work with. Thank you for the inspiration.
Renate
Coffee themed Insert for your Journal.
This insert measures about 41/4 x 31/4 inches. I used my coffee dyed cardstock for this project.
On the inside I used the Tim Holtz die. Then I just printed several words out, and cut them out with different dies I have. I also had a spoon die.
These are my cards.
Here you can see what the die looks like.
... and the back. Plenty of room to journal on the inside and back.
I just glued a piece of fabric to the spine to strengthen it.
Renate
Subscribe to:
Posts (Atom)


