Thursday, October 31, 2019
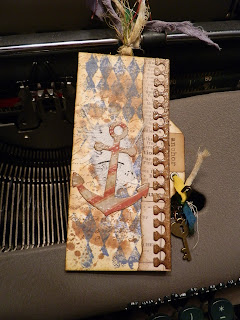
Altered Paperclips with Hidden Pocket.
Attic Lane has a great tutorial on how to make these paperclips. I stamped my own pattern on some white cardstock.
This one I made a bit taller, so I could fit a Rolodex card inside, and I added a tab with the EPB. On the border and the anchor I used some UTEE.
The Rolodex card I had to shorten about 1/8 of an inch on both sides.
On this one I added some sewing on the top and bottom.
I added eyelets on both to add some charms. These are easy to make and make a nice addition to any journal. Renate
Sunday, October 20, 2019
Loaded Envelope.
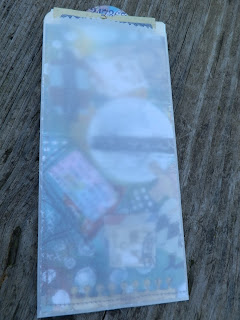
I had fun putting this project together. In the front pocket I have a vellum shaker tea bag and a vellum envelope with goodies inside.
On the left is an envelope and on the right 2 journal cards. I like to alter old receipts and use them as journal cards. I also made the journal card on the far right.
For the base of this vellum pocket, I used old book pages. I stamped the front of the vellum pocket with a post card stamp I have. (I've seen a tutorial for that, but can't remember who it was.)
On the inside is another journal card.
On the top I just typed some words, that can be cut apart to use, and I made some more journal cards.
Here I made a Zentangle bookmark.
I filled a vellum pocket I made with some more goodies.
I will be making another one... not hard to do. Renate
Friday, October 4, 2019
Altered Paperclip with Tug Spot and Pocket.
The tutorial I've seen was over at: Include a Thank You... She also curls her paper clips. I'm still working on that.
This paper clip has a tug spot on top and I also added a Vellum pocket on the bottom.
This is a great way to tug away little notes in your journal.
Renate
Wednesday, October 2, 2019
Fabric Origami Pouches.
As I was browsing You Tube one day, looking for my next project idea, I came across an unboxing of a stationery Bento box. That was quite impressive. Looking to see how to maybe make one, I stumbled across these origami pouches, and I thought, why not sew one of these and include ephemera and other goodies, instead of a box. These are easy to sew. Mine are 18 x 18 inches of fabric. The size of the front pockets depend on how you fold the center. This was my first try. You can see how low the outer pockets are.
This is what this one looks like pulled together.
Here you can see the difference in the front pocket and the height of the pouch. I used scraps of fabric I had laying around.
Inside view.
When it's pulled together, you can see the pockets better. You have also got the same pockets on the other side.
Here I just stuck an altered envelope in the pocket so you can maybe see it better.
This one is also made out of several scraps.
They are fun and easy to make.
My daughter's have already "claimed" these 2 pouches!!!
I want to make another one and add ephemera and other goodies.
Renate
Tuesday, October 1, 2019
My take on "Specimen" Cards.
I took my pictures on my old typewriter, since it's still quite humid outside, and my lens kept fogging up. Liz the paper project had a tutorial on making these Polaroids. I used the stitched slots die from Tim Holtz, and just removed the slots.
For the background I just typed random words on a piece of colored paper. Here I used Vellum. I just covered the back with a book page.
Then I thought why not use my Rolodex cards. For the front I used acetate and an old stamp from my Mom.
On the back I used Vellum, but the same image.
Then I made one upright. I used acetate for the front and back, just different images. Here I used part of a map as the background.
For this side I just used some leftover paper I had as the background. I typed both phrases on my typewriter, and cut it out with my stitched circle die.
Just another way to use up my stash. Thanks Liz for the idea.
Renate
Subscribe to:
Posts (Atom)


